| HIFI-FORUM » Fernseher & Beamer » Projektoren / Beamer » Leinwände, Beamerzubehör, Messtechnik & Co. » Ted's LightSpace CMS Calibration Disk | |
|
|
||||
Ted's LightSpace CMS Calibration Disk+A -A |
|||||
| Autor |
| ||||
|
Nudgiator
Inventar |
#1
erstellt: 30. Okt 2013, 02:34

|
||||
|
Ich möchte an dieser Stelle auf die neu erhältliche "Test-Pattern Disc" des Users TED hinweisen. Er hat etliche Monate seiner Freizeit investiert, um die Testpatterns zu erstellen. Der Clou an der Sache: das ist die einzige Disc, mit der man OHNE externem Pattern-Generator direkt mit der professionellen Kalibriersoftware namens LightSpace HCL arbeiten kann ! Die Disc enthält jedoch etliche weitere Testpatterns zur Einstellung von TVs, Projektoren etc. Anbei ein paar Links zu der Disc:  > Übersicht über alle Testpatterns < > Übersicht über alle Testpatterns < > Link auf das amerikanische AVS-Forum < > Link auf das amerikanische AVS-Forum <
|
|||||
|
TX50VT20E
Stammgast |
#2
erstellt: 30. Okt 2013, 14:15

|
||||
|
Ich dachte, der Link wäre umsonst. Sieht so aus, als würde dieser 15 Dollar kosten, also nicht kostenlos. Es geht mir nicht um die 15 Dollar, sondern um die Aussage... |
|||||
|
|
|||||
|
BennyTurbo
Inventar |
#3
erstellt: 30. Okt 2013, 18:06

|
||||
|
LightSpace ist das kostenfrei oder was kostet das System? Auf seiner Seite steht 0 $ ? Schon gefunden:  http://www.hifi-forum.de/viewthread-105-2624.html http://www.hifi-forum.de/viewthread-105-2624.html [Beitrag von BennyTurbo am 30. Okt 2013, 18:09 bearbeitet] |
|||||
|
Nudgiator
Inventar |
#4
erstellt: 30. Okt 2013, 20:54

|
||||
Ursprünglich war es so gedacht, daß jeder das für die Disc "spenden" soll, was er möchte. Aber ich weiß nur allzu gut, daß da kaum jemand etwas bezahlt, getreu dem Motto: Geit ist geil !  Daher haben wir TED empfohlen, einen "festen" Preis zu verlangen. Wenn ich sehe, was Burosch und Co für eine handvoll an Patterns verlangt, sind die von TED aufgerufenen 15 USD mehr als fair. Damit sparst Du dir sogar einen externen Patterngenerator in Verbindung mit LightSpace. Daher haben wir TED empfohlen, einen "festen" Preis zu verlangen. Wenn ich sehe, was Burosch und Co für eine handvoll an Patterns verlangt, sind die von TED aufgerufenen 15 USD mehr als fair. Damit sparst Du dir sogar einen externen Patterngenerator in Verbindung mit LightSpace. |
|||||
|
BennyTurbo
Inventar |
#5
erstellt: 30. Okt 2013, 21:13

|
||||
|
Was mir noch nicht ganz klar ist.... ich brauche doch entweder die Box oder einen Lumagen Prozessor in meiner Kette, damit ich LightSpace ordentlich anwenden kann? Wenn ich es richtig verstehe, bringt es mir aber nix, wenn ich mehrere Ketten bei anderen Leuten damit messen möchte? Denn die Einstellungen sind ja nachher im Videoprozessor hinterlegt als "Umrechnungsformel"? Oder was für einen Nutzen hätte LightSpace CMS ohne einen Videoprozessor dazwischen? |
|||||
|
Nudgiator
Inventar |
#6
erstellt: 30. Okt 2013, 21:44

|
||||
Für LightSpace HCL benötigst Du die eeColorBox oder einen Lumagen Radiance.
Die 3D-LUT muß irgendwo abgespeichert werden. Dazu benötigst Du bzw. die Person, dessen Gerät Du kalibrieren möchtest, PERMANENT die eeColorBox oder eben den Lumagen Radiance.
Ohne eine eeColorBox / Lumagen Radiance kannst Du die 3D-LUT nicht abspeichern und somit auch nicht nutzen. |
|||||
|
BennyTurbo
Inventar |
#7
erstellt: 30. Okt 2013, 22:26

|
||||
|
Danke jetzt habe ich es verstanden.... ist das speziell ein 3D Thema? Die Radiance kann ja auch 2D und soweit ich weiß, nutzt Du das ja auch für TV und Beamer? Ist die andere Box nur speziell für 3D zu nutzen? Hast Du ca. Bezugspreise aktuell für beide Varianten? |
|||||
|
Nudgiator
Inventar |
#8
erstellt: 30. Okt 2013, 22:36

|
||||
Nein, mit 3D hat das garnix zu tun.
Ich nutze meinen Radiance für den TV und Beamer inklusive zugehöriger 3D-LUTs.
Nein. Die eeColorBox kann 3D-Signale NICHT (!) benutzt werden, sonder NUR für 2D-Signale.
Die eeColorBox kostet 375 GBP + 20% VAT + Versandkosten. Der Lumagen Radiance 2021 liegt UVP bei 2795 USD + 19% MwSt + Versandkosten. |
|||||
|
BennyTurbo
Inventar |
#9
erstellt: 30. Okt 2013, 23:52

|
||||
|
Ok, also bezieht sich das 3D LUT nur auf den perfekten 3D Farbraum gemessen an Helligkeit, Sättigung und Farbpunkt im CIE Dreieck zueinander? |
|||||
|
Master468
Inventar |
#10
erstellt: 31. Okt 2013, 00:27

|
||||
Es charakerisiert die Abbildungseigenschaften – in diesem Fall also RGB-zu-RGB. Im Gegensatz zu einer einfachen 1D-LUT können komplette Farbraumtransformationen gespeichert werden (über entsprechende Stützstellen, sonst wäre die LUT viel zu groß). Gruß Denis [Beitrag von Master468 am 31. Okt 2013, 00:30 bearbeitet] |
|||||
|
Nudgiator
Inventar |
#11
erstellt: 31. Okt 2013, 02:52

|
||||
|
*Harry*
Inventar |
#12
erstellt: 15. Dez 2013, 14:37

|
||||
|
Ted hat zu seiner Disk V1.0 den CalMAN-Workflow V1.0.3 bereitgestellt. Die Sektion Pre-Calibration Tools -> Color Gamut wurde angepasst. Vefügbar für alle registrierten Disk-Besitzer.  http://s25.postimg.org/78uxb16xb/Pre_Calibration_Tools_1_0_3.png http://s25.postimg.org/78uxb16xb/Pre_Calibration_Tools_1_0_3.png http://s25.postimg.org/eq44q8wgf/Color_Gamut.png http://s25.postimg.org/eq44q8wgf/Color_Gamut.pngDetails hier:  CalMAN Workflows CalMAN Workflows [Beitrag von *Harry* am 15. Dez 2013, 19:58 bearbeitet] |
|||||
|
TX50VT20E
Stammgast |
#13
erstellt: 15. Dez 2013, 18:20

|
||||
|
Bist Du sicher mit der Version 1.03 bei der Disk? Ich denke eher, es sind nur neue Workflows? Oder? Die Disk bleibt 1.00 |
|||||
|
*Harry*
Inventar |
#14
erstellt: 15. Dez 2013, 19:59

|
||||
|
Besten Dank für den Hinweis, ist berichtigt. |
|||||
|
Nudgiator
Inventar |
#15
erstellt: 02. Apr 2014, 19:15

|
||||
|
TED hat eine neue Version seiner Disk veröffentlicht:  > Klick ! < > Klick ! <Bitte auch die nachfolgenden Postings beachten. Dort werden die Unterschiede zur alten Version erklärt. |
|||||
|
*Harry*
Inventar |
#16
erstellt: 23. Apr 2014, 20:23

|
||||
|
Ted hat eine super Übersicht LUT-fähiger Videoprozessoren zusammengestellt, worüber man sich ratzfatz informieren kann, was die jeweiligen Geräte so leisten bezüglich LUT-"Auflösung", interner Signalprocessing-Bittiefe, unterstützte In/Out-Auflösungsarten+Bittiefe, HDMI-Version der Schnittstellen, Testbildgeneratorfähigkeit, usw.:  LUT Boxes / Video Processors LUT Boxes / Video Processors |
|||||
|
*Harry*
Inventar |
#17
erstellt: 01. Jun 2014, 11:53

|
||||
|
Kleines Update von TED: Seine umfangreiche Testpatterndisk gibt es nun in reduzierter Form kostenlos. Es lässt sich damit eine Schnellprüfung zur Beurteilung der Primär- bzw. Primär- und Sekundärfarben bezüglich Gamma & Gamut mittels der ebenfalls kostenlosen Version  LightSpace DPS durchführen. LightSpace DPS durchführen. Info & Beschreibung:  http://www.displayca...Version_Features.png http://www.displayca...Version_Features.pngAuch für CalMANs ColorChecker gibt es eine kostenlose Version:  http://www.displayca...Version_Features.png http://www.displayca...Version_Features.pngDesweiteren hat er ein paar nützliche Testbilder zur Grundeinstellung von z.B. Helligkeit & Kontrast dazugepackt:  http://www.displayca...Version_Features.png http://www.displayca...Version_Features.pngHier noch Ted's persönliche Info: Today I'm releasing a Free Version of my calibration disk. Ted's LightSpace CMS Calibration Disk Free Version is a Lite Version of the Full Disk that works with the following public available free calibration software solutions: Light Illusion's LightSpace DPS & SpectraCAL's CalMAN ColorChecker. The Free Version Download Link is including both format versions, Blu-Ray ISO and Media Files Version (MP4+MKV); This gives a wide device playback compatibility  Ted's LightSpace CMS Calibration Disk Free Version Download Instructions: Request a Free Download Link from  here. here.Required Free Calibration Software Downloads: LightSpace DPS (Display Profiling System) Free Version Download Instructions: 1) Download LightSpace CMS Demo from  here. here.2) Request a Free DPS Licence from  here. here.CalMAN ColorChecker (Free Version) Download Instructions: Register to receive a free CalMAN ColorChecker license key by filling out the download form  here. here. |
|||||
|
*Harry*
Inventar |
#18
erstellt: 24. Jun 2014, 18:33

|
||||
|
Weiteres Update von TED: Seine Testpattern-Disk ist nun auch für HCFR verwendbar. Nachstehend Ted's persönliche Info mit Bitte um Veröffentlichung in unserem Forum: Dear disk users, After confirmation from Zoyd; the developer of current HCFR, the disk is officially compatible with HCFR Open Source Software. This has been discussed  here & here &  here. here.So this makes the Ted's LightSpace Calibration Disk now compatible with all available calibration solutions below:  http://www.displayca...Software_Support.png http://www.displayca...Software_Support.pngHCFR users can use some CalMAN and ChromaPure Chapters from current version of the disk to perform measurements with HCFR. The available Disk Chapters that are accurate and match the HCFR's Color Engine Calculations are the following: 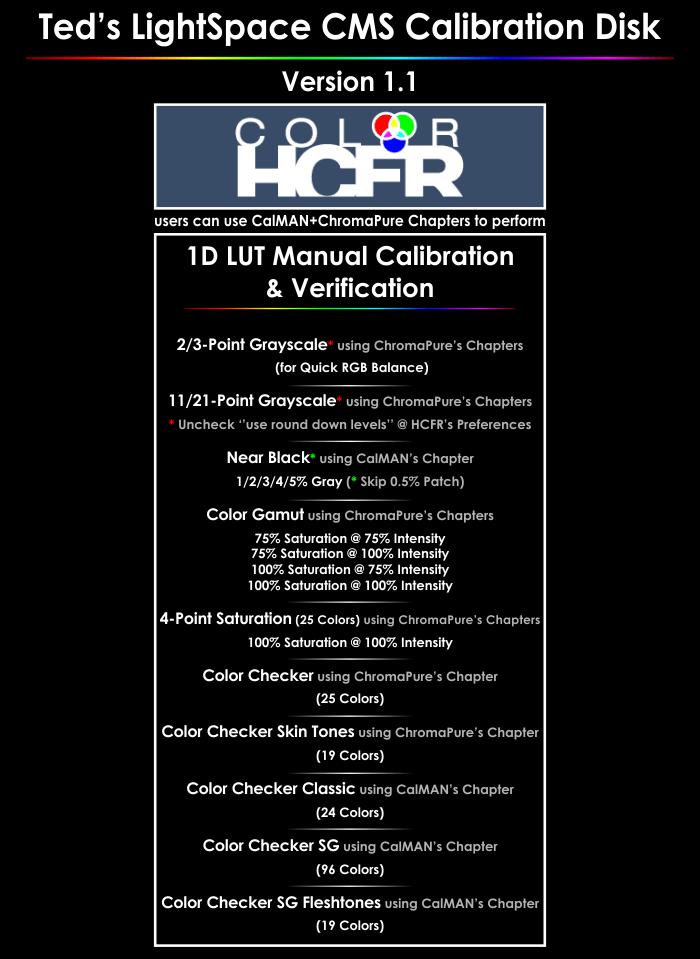 Note: Uncheck ''use round down levels" that is located to HCFR Preferencies -> General. Also HCFR 3.1.1 release added CalMAN's ColorChecker SG measurements support; that made my disk the only available calibration disk with that feature, you can confirm that by checking the HCFR's Release Notes  here. here. |
|||||
|
*Harry*
Inventar |
#19
erstellt: 19. Jul 2014, 18:54

|
||||
|
Und weiter geht's: CalMAN Messabauf-Automatisierung bei Verwendung von Teds Disk ab sofort möglich Prinzip: Ein Batchfile simuliert Tasteneingaben für CalMAN; das permanente "single reading" wird damit hinfällig. Dear disk users/friends, I'm announcing some great news for your calibrations that will improve your measurements runs. Ted’s LightSpace CMS Calibration Disk – Automated Procedure for CalMAN 5 Chapters - Free Feature for All Users with Full Version or Free (Lite) Version of the Disk As you all know from your experience of using the Version 1.1 of my calibration disk so far, the whole measuring procedure experience for CalMAN users was semi-automated since now. CalMAN Users of the Version 1.1 of the disk had the option to select a chapter with 2 / 6 / 10 sec of display time for each patch initially, working like a pattern generator, and they only had to let that chapter sequence flow since the patches had the exact same order as CalMAN requested them... without using their Blu-Ray Player/Media Player Remote anymore... just they had to focus their eyes to their display to watch the info screens before each pattern and later to click multiple times from CalMAN the 'Single Measure' Button. This semi-automated procedure was very helpful,  as a lot of users had reported through their feedback, and made their calibration experience easier by using lower times than before by using of their player remotes. as a lot of users had reported through their feedback, and made their calibration experience easier by using lower times than before by using of their player remotes.This was bringing the user closer to 'an external pattern generator experience' but without spending a large amount of money to get any expensive external pattern generator. The good news for all Version 1.1 disk users is that from now on this procedure will be fully automated for CalMAN software users. There will be no need to click multiple times any buttons with their mouse anymore. All the disk users of the  Full Version of my calibration disk will be able to use all it's automated measurement features of this utility. Full Version of my calibration disk will be able to use all it's automated measurement features of this utility.The users of the  Free (Lite) Version will be able to run the ColorChecker Classic measurement only. Free (Lite) Version will be able to run the ColorChecker Classic measurement only.It's a nice and very useful feature to for automated measurements of your display performance without using any external pattern generator or a IR-Controller... Needs only from the user to press a key when he will see the first patch info screen to his display... after that you can leave your blu-ray remote/mouse etc... move back... and watch the color patch change and the CalMAN Charts bars & dE numbers... How is this possible? 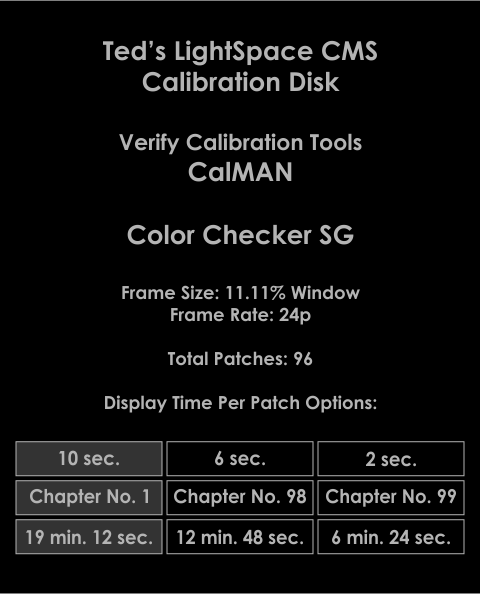 Intro As you know each CalMAN Chapter starts with a 5 sec chapter info screen and after that there is a 1.5 sec pattern info announcement before each color patch to prepare for which patch you will measure. This followed by a 0.5 sec of black frame and later you have the option to select 2/6/10 sec of displaying time for each color patch. Ted’s LightSpace CMS Calibration Disk (Version 1.1) features 3 user options for automatic pattern change: 2 / 6 / 10 sec per each color patch. To access this you have to dial the Chapter button you see at the Chapter Info Screen using your numpad of your Blu-Ray Player, for example, to go directly to CalMAN's ColorChecker SG 2 sec. per color, you have to press '99'. Klein Colorimeter users will be able to use 2 sec per color to measure very fast, and users of other meters (i1Display PRO, SpectraCAL's C6, XRite's i1PRO1/2, BasicColor Discus) will had the option of 6 or 10 sec of displaying of each Patch. Procedure CalMAN 5 has some keyboard shortcuts for quick meter or slider actions. For example, the F5 keyboard button takes a single measurement and with the AutoAdvance option enabled from your Source Settings in CalMAN the slider will select the next color automatically after each measurement. We are using a Batch file that you have to run and initially select what Chapter you want to use. For example, to select ColorChecker SG (96 Color Patches) you have to input “10” and hit the Enter Button and after you see on your display the first patch. You have only to press a keyboard key and that Batch file will send all the required timed commands without any other user prompt. Now you will be able to use long measurement runs like 10-Step Saturation or ColorChecker SG automatically. Using Ted’s LightSpace CMS Calibration Disk 1.1 you need only select the Chapter you want to measure using your Player Remote and when you see the first patch to your display to press a key from the batch utility. All the required measurements will be automated. That Batch file contains a series of DOS commands that do the required tasks for this automated procedure. We are using the WinSendKeys utility to send the keyboard shortcut commands. This is the list of the Batch files that are included: 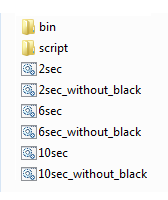 NOTE: Don't rename that 6 Batch files because they will not work later. You can change the folder name or create shortcuts with custom names of you like. Pre-Automated Procedure Testing Before using any Automated Batch file you have to measure the Chapter in which you are interested to see which Chapter of 2/6/10 sec. patch display time works without problems with your current display/meter setup. Try to take the measurements the semi-automated way as you were doing previously. For example, use the 6 sec per patch chapter to see if any measurement takes more than 6 sec. time to return results. If this is happening with your current meter settings, it will break the sync of the automated measurements. Try to reduce the exposure setting and this will reduce the required time your meter will need to read each patch. For SpectraCAL C6 users It’s recommended to use a fixed exposure time setting and not x Sample setting because low luminance patches will require more time and will break the sequence when you read a Black Patch or generally dark patches like 5/10% Gray or 5/10/15% Luminance etc. In some cases the C6 will take about 15/20 sec to read black etc. 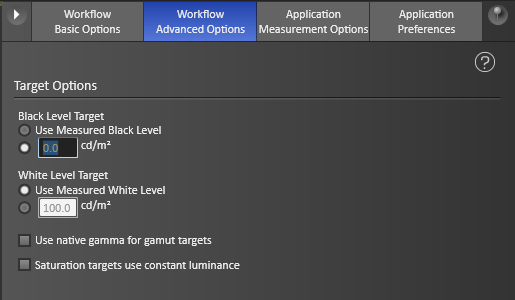 If you want to skip the black patch reading from the automated measurement procedure, we have created batch files to skip from all available chapters the Black patch measurement in case you want to manually enter your Black level luminance (cd/m2) into CalMAN’s Workflow Advanced Options or in case you take this measurement manually. X-Rite i1Display PRO (i1d3) / SpectraCAL C6, i1PRO1/2 or Discus meters will be able to use the 6 or 10 sec. per color patch Chapter & Batch file. Klein users will have no problem using the 2 sec. per color patch Chapter & Batch file. CalMAN Pre-Automated Procedure Setup 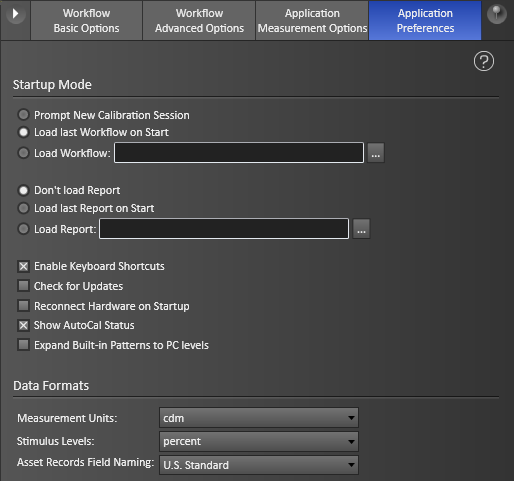 Open CalMAN’s Settings Panel and check that you have enabled the Keyboard Shortcuts. 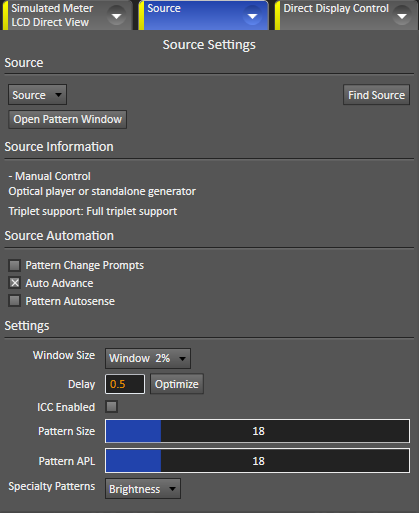 It’s optimum to set the pattern delay 0, or 0.5 sec. It has to do with each display and needs some testing to find which delay works better in your setup. If you will use  Ted’s CalMAN’s 5 Verify Calibration Tools Workflow or any other, open the Source Settings Panel and check that the Auto Advance is checked. Ted’s CalMAN’s 5 Verify Calibration Tools Workflow or any other, open the Source Settings Panel and check that the Auto Advance is checked.Using Virtual Meter you can check if your Keyboard F5 button is taking measurements. Simply select a color from your CalMAN slider and press F5 to see if it’s measuring and if it is going to the next color slider. If by pressing F5 nothing happens the automated procedure will not work and you need to re-check your settings. Start Automated Procedure Batch File Once you have decided and tested manually which sec. per color chapter you can use with your current display/meter setup settings, locate the Batch files folder and double click to run the batch file or your selection. When you double click the Batch file for the first time, a Security Warning will pop-up. You can un-tick the radio button if you want this warning to not be displayed in the future. 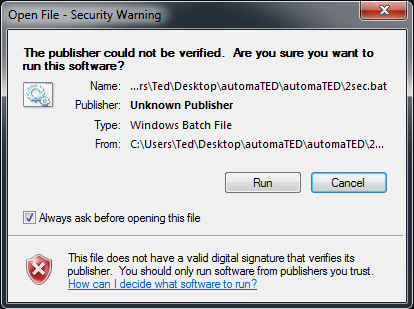 This is the Batch File Main Screen.  http://www.displayca...ted_Procedure_01.png http://www.displayca...ted_Procedure_01.pngHere you can input your number for the chapter you want to use and press the ‘Enter’ key to continue. The Batch file will now wait...  http://www.displayca...ted_Procedure_02.png http://www.displayca...ted_Procedure_02.pngNavigate the disk menu or locate the media file... Using your Player Remote, select the Chapter from the CalMAN Session of the disk you want to measure... Check that you have CalMAN Window Opened on your desktop and it’s not minimized on your taskbar. Select from the CalMAN Slider the color patch that the Batch file is asking for before continuing. After selecting the required Chapter from Ted’s LightSpace CMS Calibration Disk -> From CalMAN Session, you will see the initial Chapter Info Screen... after that screen when you will see the first color patch info screen to your display press a key from your keyboard... and let it flow... After the end of the measurements, the Batch file it will return to it's main menu for you to select a new measurement if you like. 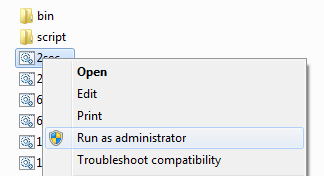 If you do all the steps correctly and the automated procedure measurements hasn’t started, re-run the Batch file and by right clicking select ‘Run as administrator’ command. Download Instructions All Ted's LightSpace CMS Calibration Disk users of Full Version or Free (Lite Version) will get by email all the above instructions and the Download Link of the Batch Files to their e-mail address. We have tested these Batch Files using Klein K-10A, i1Display PRO, iPRO1/2 meters without any problem. Just remember that if the semi/automated procedure works for you, then the Fully Automated will work also. Try first to find which one of 2/6/10 sec. per color patch Chapter works to your setup and later move to that Batch Files Automated measurement way. These Batch files are using MS-DOS commands and they have tested and work to Windows XP, 7, 8 by us so far. If you have any question of problem, please contact me. [Beitrag von *Harry* am 19. Jul 2014, 21:44 bearbeitet] |
|||||
|
*Harry*
Inventar |
#20
erstellt: 04. Aug 2014, 20:18

|
||||
|
Nachtrag von Ted: Detailbeschreibung zur automatisierten Messung per CalMAN (Sorry dass einige Bilder nur als Link erscheinen - aus unbegreiflichem Grund weigert sich die Foren-SW, manche IMG-Anweisungen korrekt auszuführen, denn folgt man den Links, sieht man die Screenshots) Hello, I'm posting some extra and more detailed instructions for the CalMAN 5 Automated Measurement Utility below. For Example, If you want to measure 5-Point Saturation using the Automated Procedure Measurements Utility, follow these steps: 1) Run the Batch file (2 / 6 / 10sec.), you will see the following screen: *(I will use the 2 sec. Batch file for that example)  http://www.displayca...ation_Example_01.png http://www.displayca...ation_Example_01.png2) Press '4' key and then 'Enter' key from your keyboard; you will see the following screen:  http://www.displayca...ation_Example_02.png http://www.displayca...ation_Example_02.png3) It will ask you to open your CalMAN 5 workflow payout page where the 5-Point Saturation layout page is located, for example in case you will use the exculsive CalMAN 5 workflow I send to my disk users, go to that page below and click to select the Black Patch from the CalMAN's Slider: (you can use any other custom or CalMAN 5 workflow you like that is configured for 5-Step Saturation measurements)  http://www.displayca...ation_Example_03.png http://www.displayca...ation_Example_03.png4) While the CalMAN 5 window is opened to your background select from your windows taskbar the Batch File Window and this will bring the Batch File window in front of CalMAN window (the Batch file is waiting for a keyboard key to be pressed to start the Automated Measurements procedure)...like the screen below:  http://www.displayca...ation_Example_04.png http://www.displayca...ation_Example_04.png5) Now using your Blu-Ray Remote go and select the 5-Point Saturation Chapter from Blu-Ray Disk Menu screen of CalMAN Chapters / or locate and select the file in case you are using the Media Files Version of my disk:  http://www.displayca...ation_Example_05.png http://www.displayca...ation_Example_05.png6) You will see that initial Chapter Info Screen for 5 sec....*(as I used for that example the 2 sec. per patch chapter, press '35' from your Blu-Ray Remote to use the 2.sec per patch chapter).... and get ready to press the keyboard key: 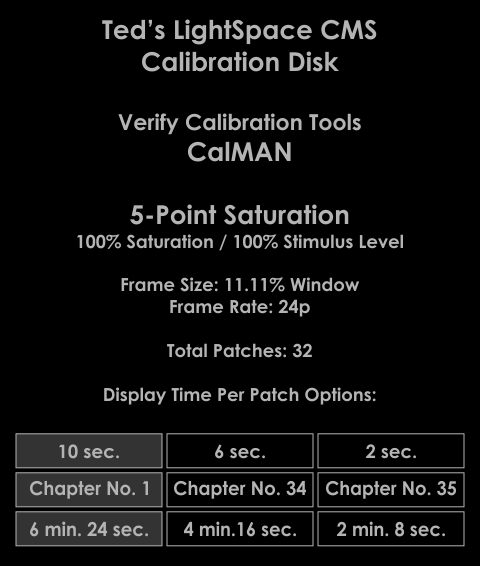 7) When you will see the first frame of the first pattern info screen (see screenshot below), press immediately a keyboard key: 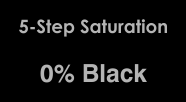  After pressing the key the Automated Measurement Procedure for CalMAN 5 will start, the Batch File window will be minimized and your CalMAN 5 window will be stay in front; like the screen below: After pressing the key the Automated Measurement Procedure for CalMAN 5 will start, the Batch File window will be minimized and your CalMAN 5 window will be stay in front; like the screen below: http://www.displayca...ation_Example_08.png http://www.displayca...ation_Example_08.png9) There no other user input required until the end of that 5-Step Saturation measurements, just stay back and watch the experience of how simple and very useful this feature is... it's like using an external pattern generator to generate the patterns for you, and the most important is that you are calibrating using your actual movie playback source, because external pattern generators can't see / ingore your source output errors. You can use CalMAN's virtual meter to do a quick testing before preparing your meters for real measurements. |
|||||
|
*Harry*
Inventar |
#21
erstellt: 18. Sep 2014, 20:05

|
||||
|
Neue Info von TED: Hello, I have just uploaded a new webpage with a lot of detailed instructions about the available Measurement Solutions for Ted's LightSpace CMS Calibration Disk users. These instructions are helpful the for Free Version or Full Version of the disk users. There a lot of picture examples and text instructions that makes pretty difficult to post all these instructions here, so you have to visit that page:  Measurement Solutions for CalMAN/ChromaPure users using Ted's LightSpace CMS Calibration Disk Measurement Solutions for CalMAN/ChromaPure users using Ted's LightSpace CMS Calibration DiskThe Measurement Solutions page is covering the following topics: 1) Importance of calibrating from the actual movie playback source. 2) Semi-Automated Measurements for CalMAN users with details and instructions. 3) Semi-Automated Measurements for ChromaPure users with details and instructions. 4) Automated Measurements Procedure for CalMAN users details, instructions, very detailed example about how the Batch Utility files are working with CalMAN and other notes. |
|||||
|
Nudgiator
Inventar |
#22
erstellt: 19. Okt 2014, 13:36

|
||||
|
Siehe Beitrag von Harry (die Bilder wurden nun "gethumbed" und sind somit sichtbar :)) [Beitrag von Nudgiator am 19. Okt 2014, 14:03 bearbeitet] |
|||||
|
*Harry*
Inventar |
#23
erstellt: 19. Okt 2014, 14:00

|
||||
|
TED-Update: Er hat einen neuen Workflow für CalMAN-User, womit vorher/nachher-Messergebnisse visualisiert dargestellt werden: (für vergrößerte Darstellung einfach auf's Bild klicken) 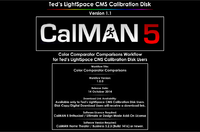 New Free CalMAN 5 Workflow (For Ted's Lightspace CMS Calibration Disk Users) Released! I have just send to all Ted's LightSpace CMS Calibration Disk users a new workflow to improve further their measuring/reporting experience. This new workflow has been designed for Reporting of Pre/Post-Calibration Results Tool for Professional Calibrators but for DIY/ Calibration Enthusiast users also. Color Comparator Comparisons Workflow has created based to an idea of a simple and 'customer friendly & easy to understand' way of reporting. It's a better way of presenting the Pre/Post-Calibration Results with Charts that are easier to understood by people not involved in calibration. The Pre/Post-Calibration Charts features only the required and most important measurement numbers. Color Comparator Pre-Post Calibration Comparisons has been designed for easier visual notice of the post-calibration improvement and it's very helpful from customers to understand the difference of the measured colors of their just-calibrated display versus the reference video performance 'look-like' using the 8-bit RGB Triplet color differences that color comparator is based. Bellow you can find some layout pages screenshots, the full workflow layout page screenshots are available @  CalMAN 5 Workflows for Ted's LightSpace CMS Calibration for Disk Users webpage. CalMAN 5 Workflows for Ted's LightSpace CMS Calibration for Disk Users webpage.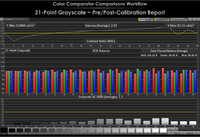 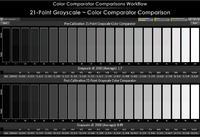 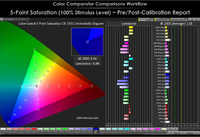 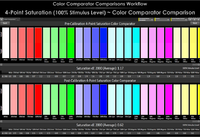 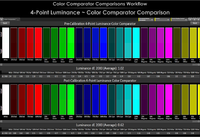 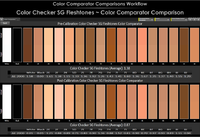 |
|||||
|
*Harry*
Inventar |
#24
erstellt: 05. Okt 2015, 19:08

|
||||
|
Alle Kalibrierfreunde, die Interesse an einer eeColor LUT-Box haben (= Videoprozessor, der das zugespielte Bildsignal im Gamma- und Gamut mittels 274.625 3D-LUT-Korrekturpunkte perfektioniert), sollten mal bei TED reinsehen:  http://displaycalibrations.com/eecolor_order.html http://displaycalibrations.com/eecolor_order.htmlDer Preis des eeColor wurde um 400 USD gesenkt; technische Spezifikationen sind dort auch angegeben. Bei Interesse bitte jedoch bedenken, dass der Versand aus den USA kommt und man in Europa Einfuhrsteuer hinzukalkulieren muss. |
|||||
| |||||
|
|
||||
| Das könnte Dich auch interessieren: |
|
TED's Calibration Disc (Alternative zu AVS-HD) *Harry* am 08.02.2014 – Letzte Antwort am 18.09.2014 – 3 Beiträge |
|
Lightspace vonswiss am 13.12.2019 – Letzte Antwort am 09.01.2020 – 2 Beiträge |
|
Der große LightSpace CMS/HCC Info, Tips und Tricks + Diskussionsthread black_eagle am 23.06.2013 – Letzte Antwort am 04.10.2015 – 71 Beiträge |
|
NEU ! LightSpace Home Cinema Light - bezahlbare Profi-Kalibriersoftware für 3D LUTs Nudgiator am 22.08.2013 – Letzte Antwort am 12.02.2016 – 139 Beiträge |
|
Brauch nochmal eine Auffrischung oder einen Crashkurs für die TEDs Calibration Disk mit Calman Walder91 am 29.05.2019 – Letzte Antwort am 02.06.2019 – 2 Beiträge |
|
Gamma-Drift-Korrektur mit Sony Projection Calibration Pro und HCFR Armin289 am 20.07.2019 – Letzte Antwort am 18.07.2024 – 227 Beiträge |
|
Kalibrier-Software ColourSpace von Light Illusion *Harry* am 26.08.2020 – Letzte Antwort am 21.01.2021 – 13 Beiträge |
|
"Spyder4 Pro" oder "i1 Display Pro" als Sensor für HCFR RC am 26.05.2013 – Letzte Antwort am 10.12.2022 – 407 Beiträge |
|
HCFR Spyder 5 falsche Messwerte? LuigiCalzone am 01.12.2017 – Letzte Antwort am 03.03.2018 – 4 Beiträge |
|
Vollautomatische Beamerkalibrierung mittels VideoEq Pro und CalMAN ! Nudgiator am 13.01.2010 – Letzte Antwort am 25.07.2014 – 51 Beiträge |
Anzeige
Produkte in diesem Thread

Aktuelle Aktion
Top 10 Threads in Leinwände, Beamerzubehör, Messtechnik & Co. der letzten 7 Tage

- Anleitung: Leinwand mit variabler Maskierung selberbauen
- Rauhfaser - eine Alternative zur Leinwand?!
- Celexon Professional Plus Enttäuschung
- Leinwand oder weiße Wand
- Knicke / Beulen im Leinwandtuch
- Motorisierte Bodenleinwand
- Rollo Leinwand mit waagrechtem Auszug?
- Helligkeit: Beziehung LUX zu cd/m² - wer kennt sich aus?
- Beamer über Spiegel senkrecht betreiben?
- Rotstich HCFR und x-rite i1 Display Pro?
Top 10 Threads in Leinwände, Beamerzubehör, Messtechnik & Co. der letzten 50 Tage

- Anleitung: Leinwand mit variabler Maskierung selberbauen
- Rauhfaser - eine Alternative zur Leinwand?!
- Celexon Professional Plus Enttäuschung
- Leinwand oder weiße Wand
- Knicke / Beulen im Leinwandtuch
- Motorisierte Bodenleinwand
- Rollo Leinwand mit waagrechtem Auszug?
- Helligkeit: Beziehung LUX zu cd/m² - wer kennt sich aus?
- Beamer über Spiegel senkrecht betreiben?
- Rotstich HCFR und x-rite i1 Display Pro?
Top 10 Suchanfragen

Forumsstatistik

- Registrierte Mitglieder928.946 ( Heute: 13 )
- Neuestes Mitgliedcelesteb07
- Gesamtzahl an Themen1.559.344
- Gesamtzahl an Beiträgen21.724.123


